")
How Can We Help?
📱 How to Create a Task in the Mobile App
Efficiently assign and manage tasks on-site by creating them directly through the Take5™ Connect mobile app. Follow this guide to ensure tasks are set up correctly and assigned to the appropriate personnel.
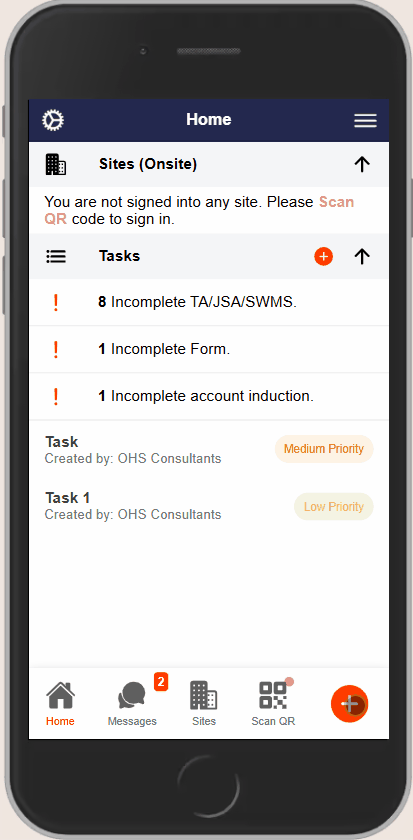
Step 1: ➕ Initiate Task Creation
- Open the Take5™ Connect mobile app.
- Tap the orange plus (+) button located at the bottom of the screen on any page.
- From the Create/Report menu that appears, select Create Task.
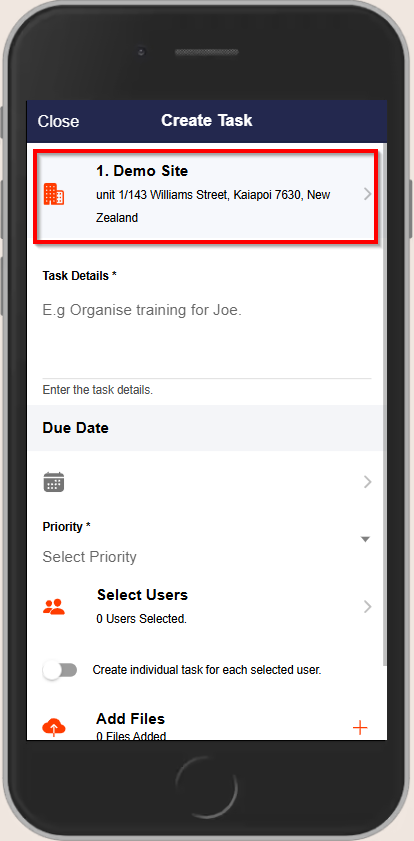
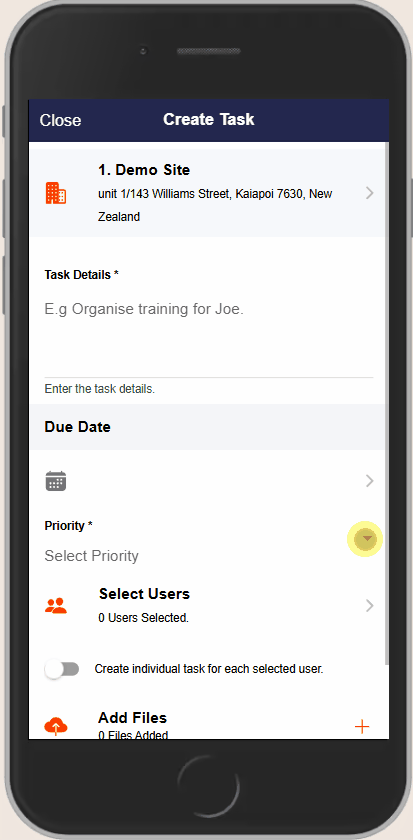
Step 2: 📍 Select Site
- The app will default to the site you’re currently signed into.
- To change the site:
- Tap the Site arrow at the top of the screen.
- A list of available Projects/Sites will display.
- Select the desired Project/Site and tap Select.
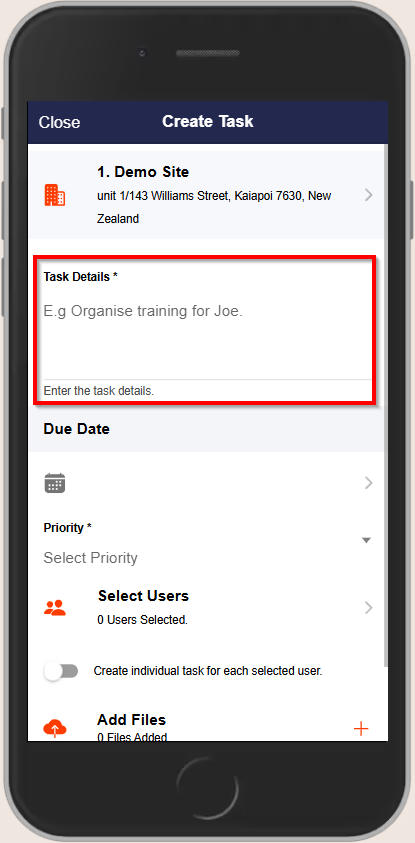
Step 3: 📝 Enter Task Details
- In the Task Details field, provide a clear description of the task, including what needs to be accomplished.
- This is a mandatory field and must be filled out to save your task.
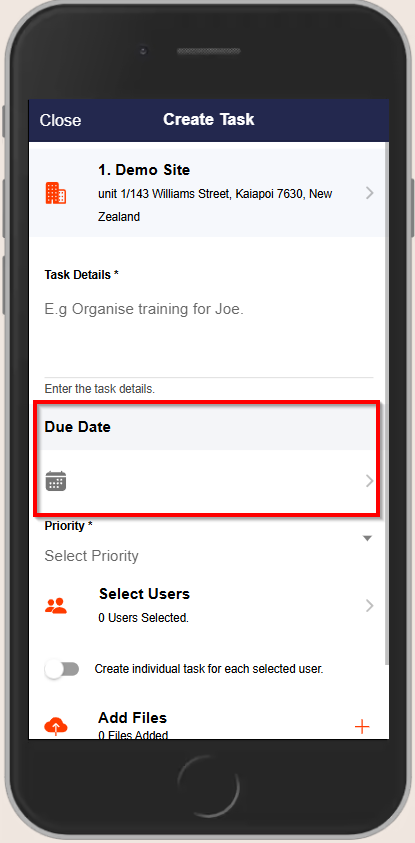
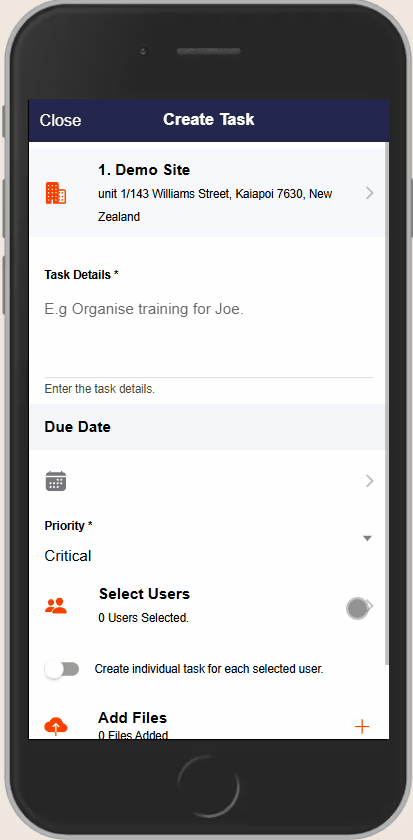
Step 4: 📅 Set Due Date
- Tap the calendar icon to open the date selector.
- Choose the appropriate due date for the task.
Step 5: ⚠️ Assign Priority
- Select the relevant priority for the task:
- Low
- Moderate
- High
- Critical
Step 6: 👥 Select Users
- Tap Select Users to display a list of all connected network users.
- Users currently signed into the site will have a green circle next to their name.
- Tap the circle next to each user’s name to add them as assignees. A tick will appear next to their name once selected.
- After selecting the relevant users, tap Select Users at the bottom of the screen.
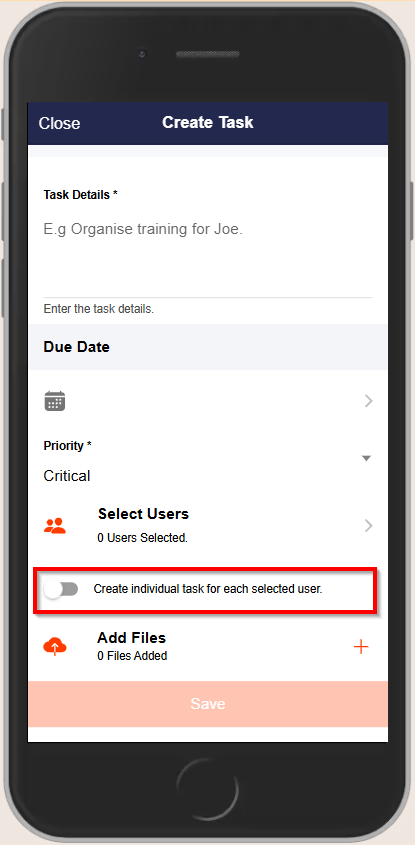
Step 7: 🔄 Create Individual Tasks (Optional)
- If you wish to create individual tasks for each selected user:
- Enable the Create Individual Tasks for each selected User option.
- This will generate separate tasks for each assignee, allowing for individual tracking and completion.
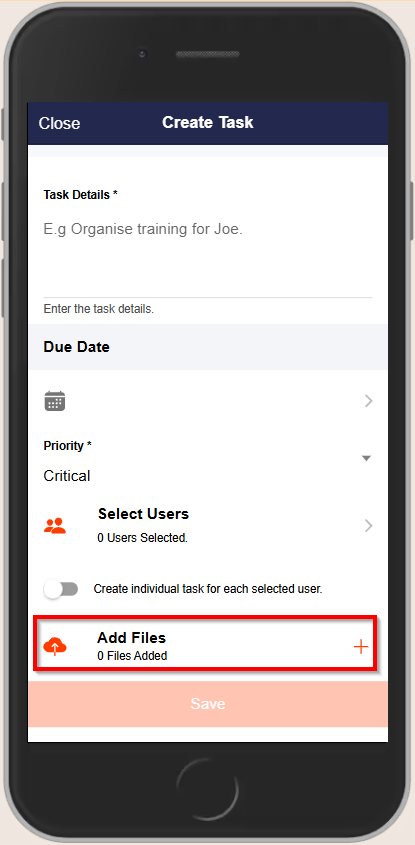
Step 8: 📎 Add Files (Optional)
- To attach relevant files or documents:
- Tap Add Files to upload documents, take photos, or select photos from your gallery
Step 9: 💾 Save the Task
- After completing all fields, tap Save either at the bottom or top-right corner of the page to finalize the task creation.
❓ Troubleshooting
- Unable to Select Users: Ensure that the users you wish to assign tasks to are connected to the network and have the appropriate permissions.
- Missing Project/Site: If the desired Project/Site is not listed, verify that it has been set up in the system and that you have the necessary access rights.
- Task Not Saving: Ensure all mandatory fields are filled out correctly. If the issue persists, contact support.
📞 Need Help?
For further assistance:
- 📧 Email: support@take5connect.com
- 📞 Phone (NZ): 0800 582 535