💻 How to Create and Manage TA/JSA/SWMS
The TA/JSA/SWMS feature in Take5 Connect™️ allows you to create and manage Task Analyses, Job Safety Analyses, and Safe Work Method Statements. Here’s how to use it.
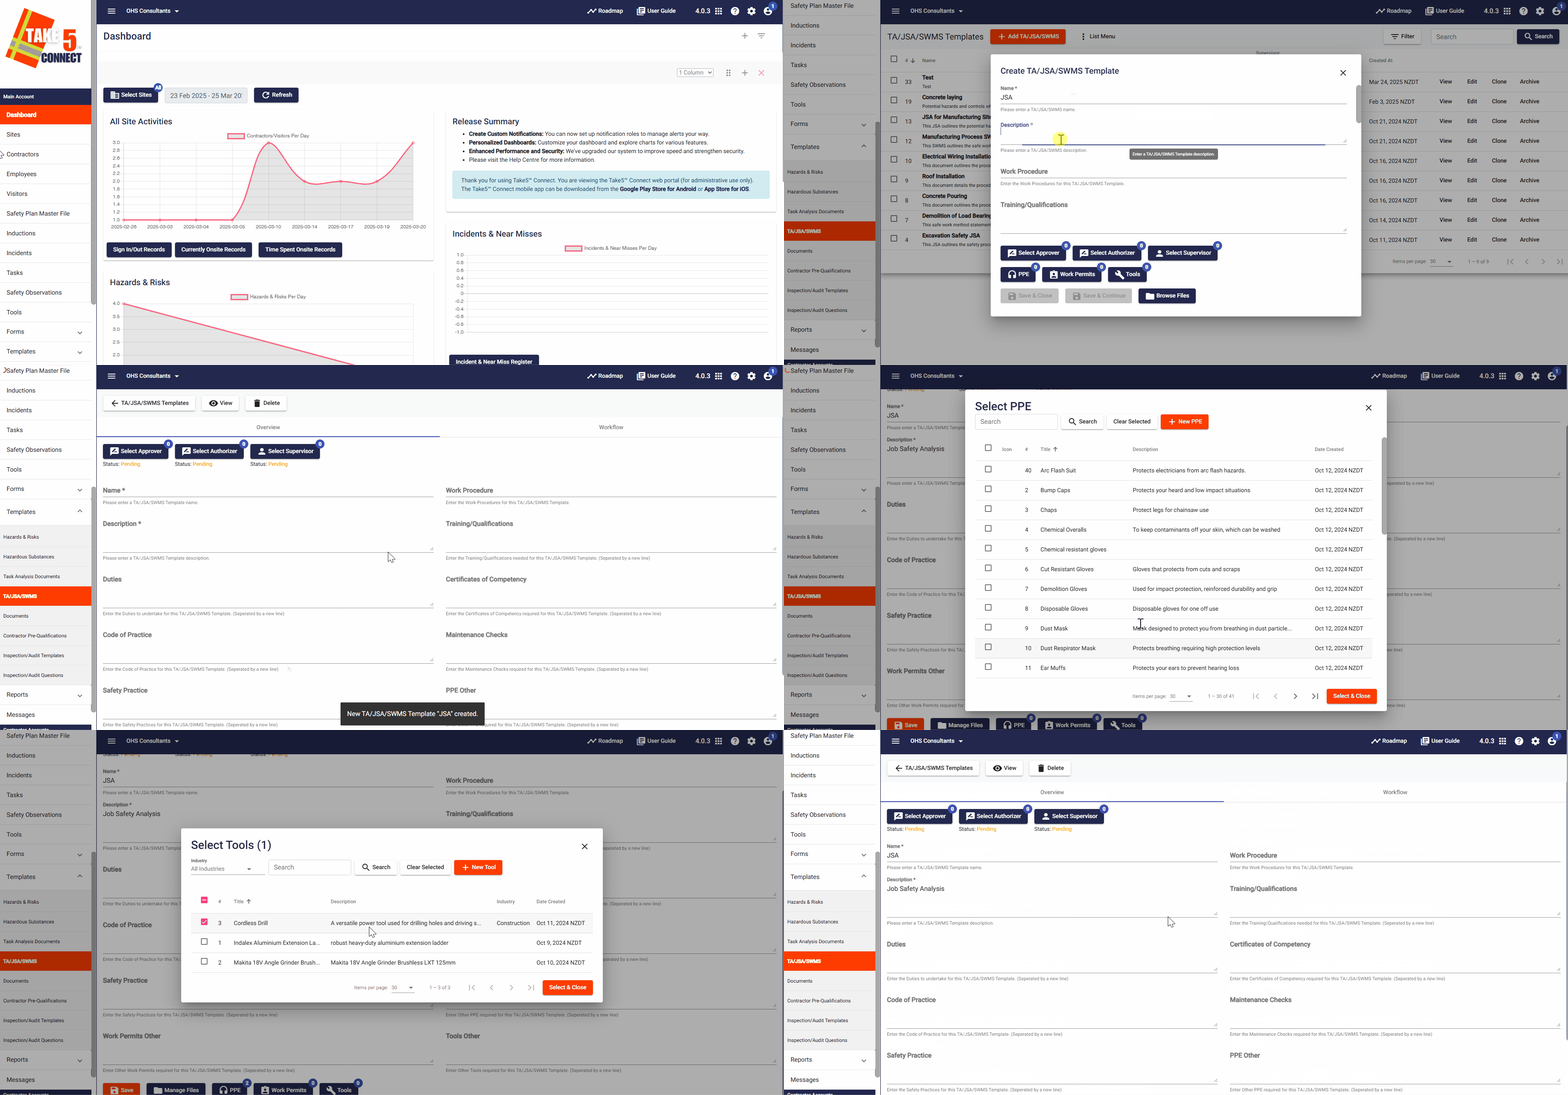
Step 1: 🔑 Create a TA/JSA/SWMS Template
- Navigate to the Templates tab.
- Click +Add TA/JSA/SWMS.
- Select Create New to open a blank template.
- Complete the fields with details such as:
- Name (template name)
- Description (brief template description)
- Work Procedure
- Training/Qualifications
- Duties
- Certificates of Competency
- Code of Practice
- Maintenance Checks
- Safety Practices
- PPE and Work Permits
- Work Permits
- Tools
PPE, Work Permits and Tools can either be typed into the dialogs boxes or selected at the bottom of the page from a pre-populated list.
Step 2: ⚙️ Create Steps for the TA/JSA/SWMS
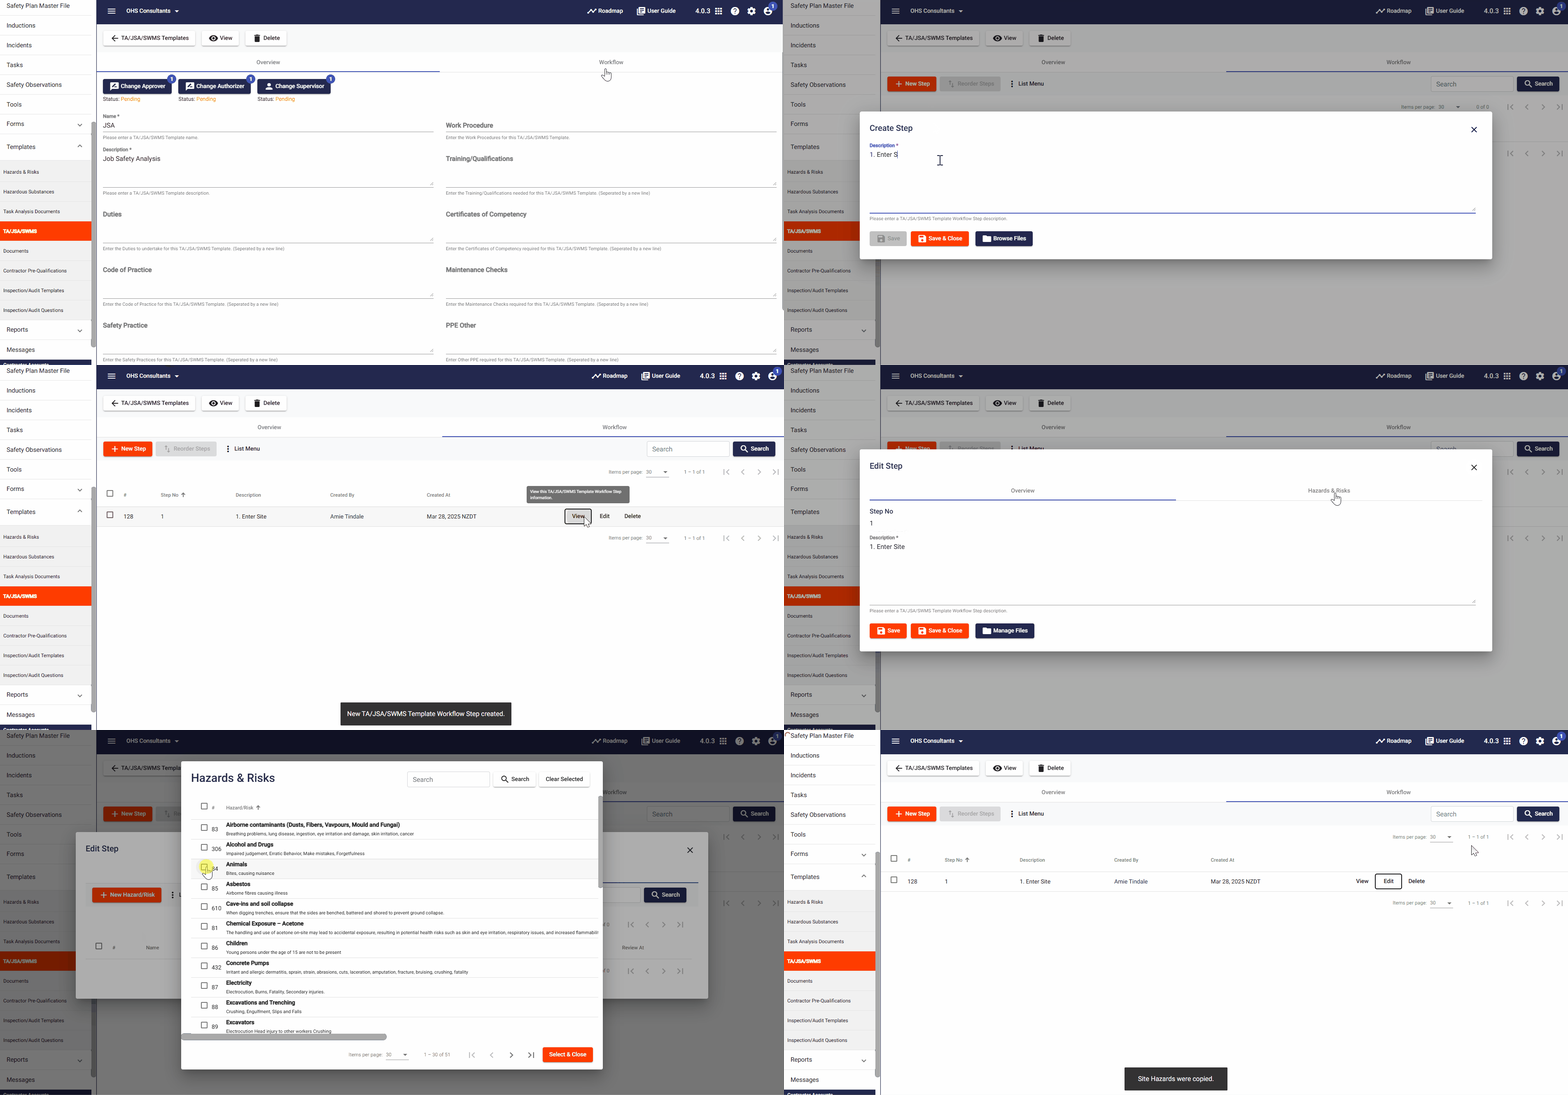
- After creating the template, you can create the steps for the TA/JSA/SWMS
- Navigate to the Workflow tab across from the Overview tab and set up the steps and associated risks.
- Click New Step and write out the first step you will take.
- After saving the step you can go back into Edit and add any associated Hazards or Risks.
- Continue this process to create a Workflow.
Step 3: ✅ Viewing TA/JSA/SWMS
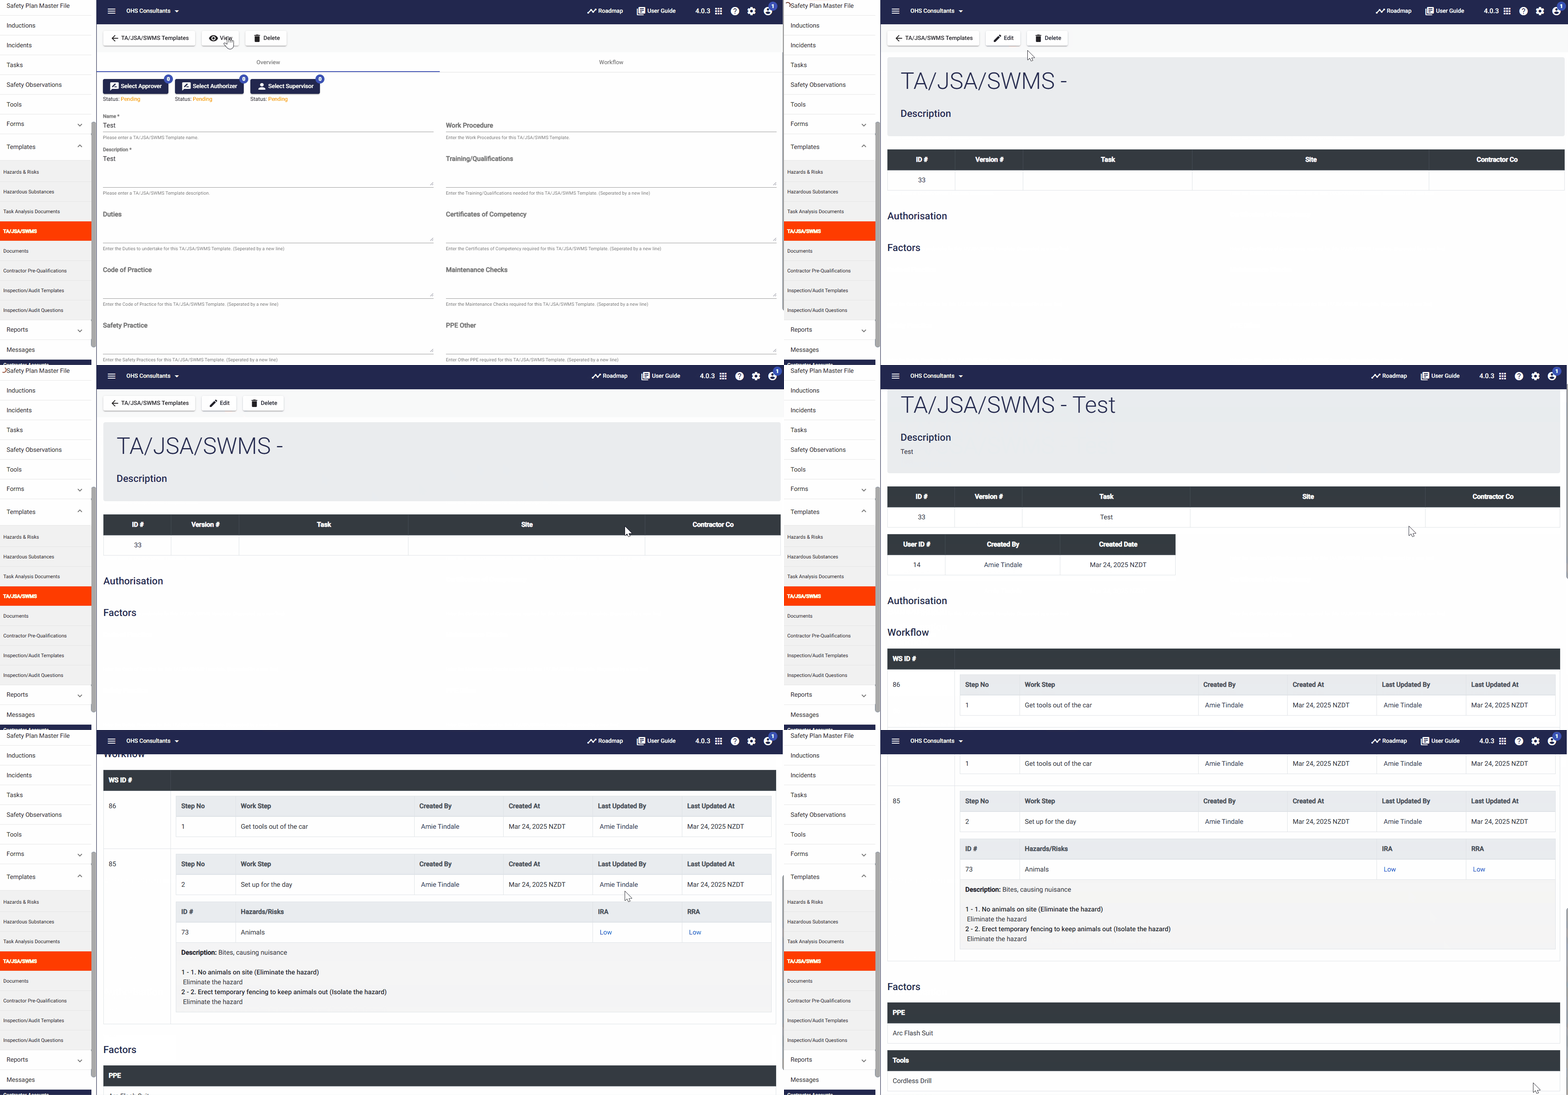
You can select View at the top of the screen of your TA/JSA/SWMS to see the appearance and format of the document.
Step 4: ✅ Approve, Authorize, and Acknowledge TA/JSA/SWMS.
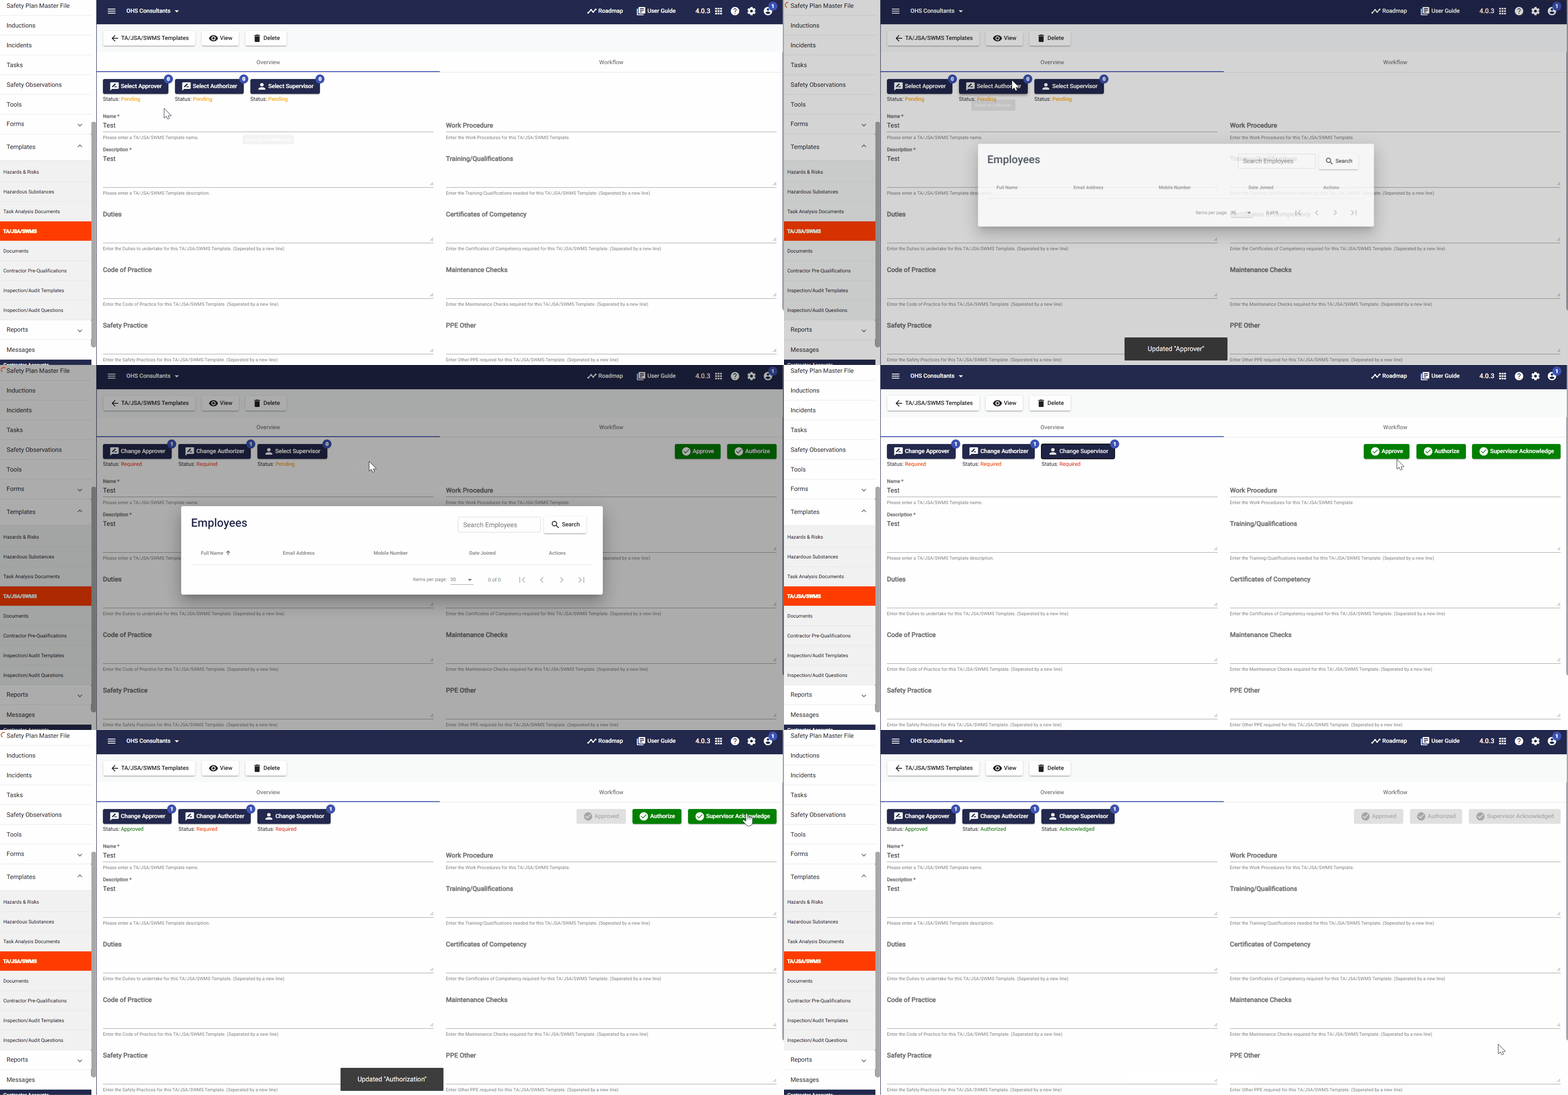
Finally, select an Approver, Authorizer and Supervisor for the TA/JSA/SWMS.
- Approvers: High-ranking members like the CEO or General Manager.
- Authorizers: Those in charge of the division.
- Supervisors: People supervising the task.
The statuses for each role will either be:
- Required (if you are the person selected)
- Pending (if assigned to someone else)
- Approved/Acknowledged (once completed)
After the TA/JSA/SWMS has been approved, authorized and acknowledged you are able to also allocate the document to Assignees, which will appear next to the others.
Step 5: ⚙️ Viewing, Editing, Cloning, Archiving
After saving the TA/JSA/SWMS Template it will appear on the account level screen.
- Here you can choose to View, Edit, Clone or Archive the template
*Note: If you make any alterations to the TA/JSA/SWMS it will create a new version that will also have to be Approved, Authorized and Acknowledged.

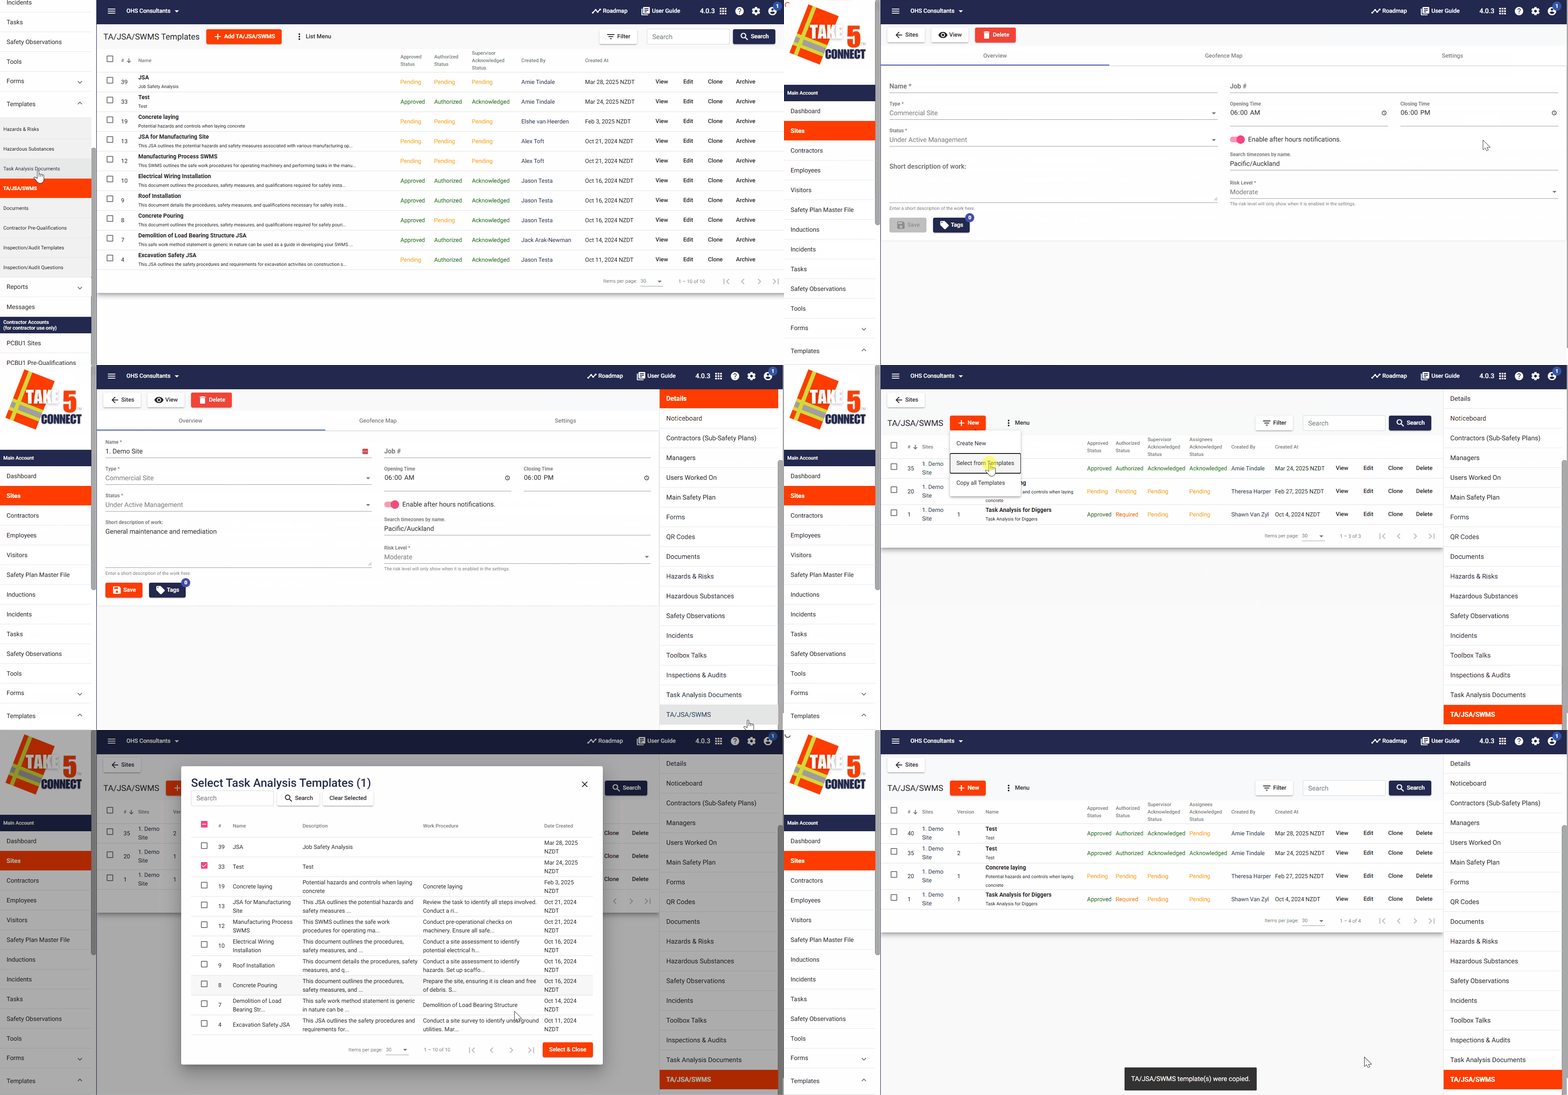
Step 5: ⚙️ Assigning a TA/JSA/SWMS to a Site
Once the TA/JSA/SWMS Template is finalized you are able to assign it to a site.
- Exit the TA/JSA/SWMS Template tab and navigate to the Sites tab
- Select Edit next to the Site you want to assign the TA/JSA/SWMS Template to
- Scroll down the right hand side bar and click TA/JSA/SWMS
- Click New and Select From Templates, and find and select the template you’ve created
📞 Need Help?
For additional support or questions, contact our team at:
📧 Email: support@take5connect.com
📞 Phone (NZ): 0800 582 535
