")
🚨 Managing an Incident
In Take5 Connect™️, managing incidents efficiently ensures effective tracking and resolution. This guide will take you through the process of managing an incident within the web portal. 👇
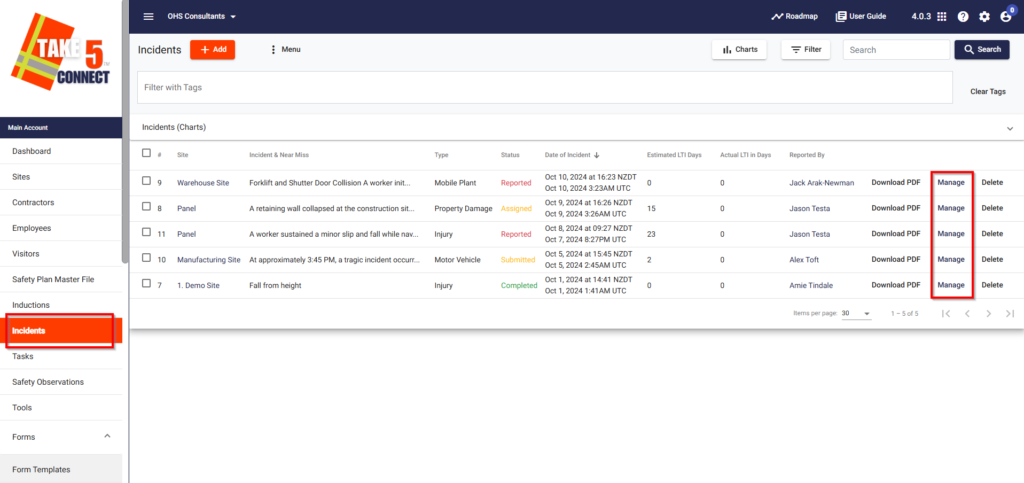
Step 1: 🔑 Access the Incidents Section
- Log into Take5 Connect™️ web portal.
- From the left-hand menu, click on Incidents to view a list of all reported incidents.
- Click Manage on the specific incident you want to manage.
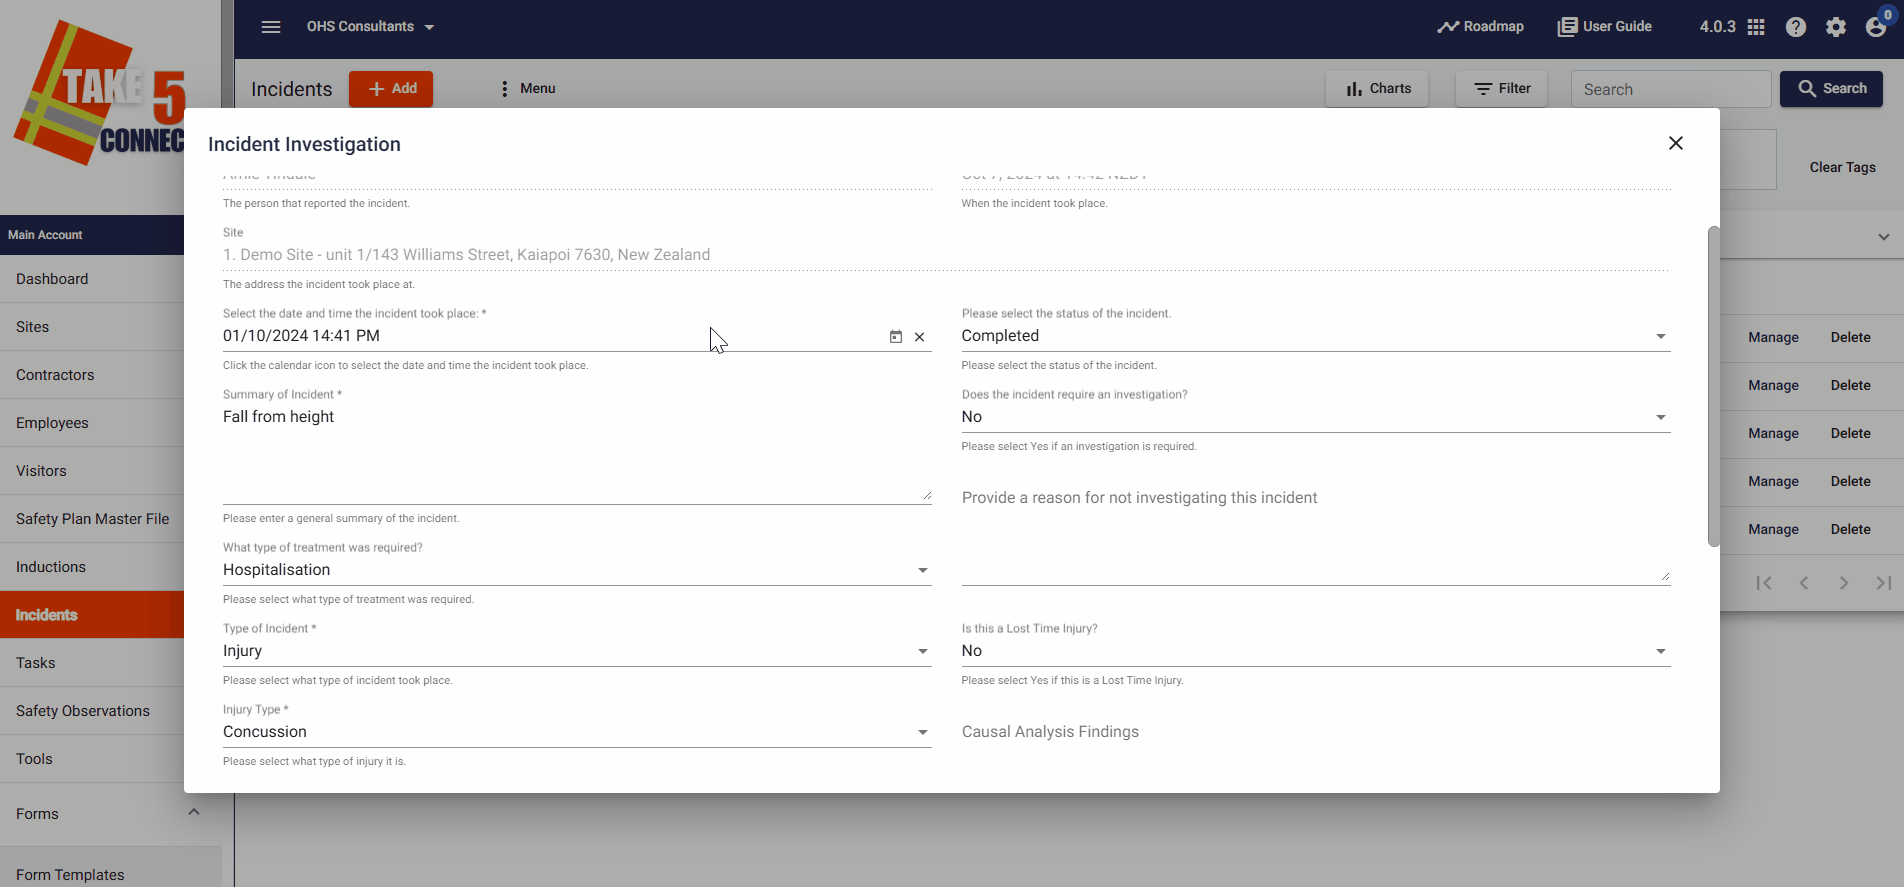
Step 2: 📋 Overview of Incident
In the Overview tab, you can update the details of the incident:
- Summary of the incident
- Date of incident
- Type of incident and treatment required
- Drug/Alcohol testing requirements
- Involved individuals
- WorkSafe notification status
- Investigation status
- LTI (Lost Time Injury) status
- Causal findings

Step 3: ✏️ LTI – Lost Time Injury
If the incident is a Lost Time Injury (LTI):
- Click on the LTI – Lost Time Injury tab.
- Click New LTI Record to add information about the injured person, health provider, ACC case manager, and return-to-work details.
- Enter LTI days and hours taken for the injury, and save the time records.

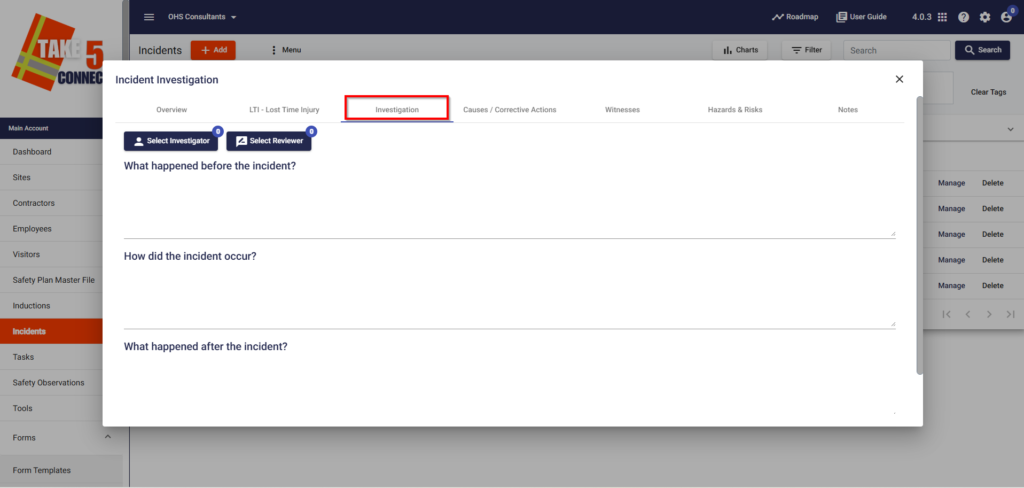
Step 4: 🔍 Conduct an Investigation
- Click on the Investigation tab to provide details about the incident:
- What happened before, during, and after the incident.
- Select an Investigator and Reviewer from the employee list.
Step 5: 📂 Add Files and Notes
You can add any relevant files or Notes related to the incident using the Manage Files section.
- Add Notes on the last tab on the top bar.
- Add Files by selecting Manage Files at the bottom of the Overview page.
- This is useful for documenting evidence or additional information.
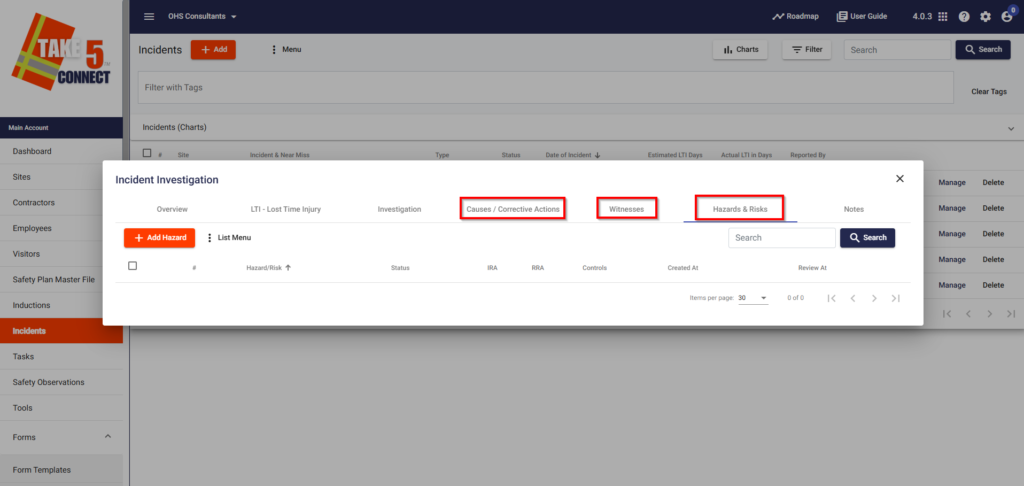
Step 6: 📂 Additional Information Sections
There are three additional tabs along the top bar to provide more information for the incident. Which include:
- Cause/Corrective Actions: Here you can add the cause(s) for the incident and what corrective action will be taken. You are also assign this action to someone or add files.
- Witnesses: Provide details of any witnesses of the incident and their statement.
- Hazards & Risks: Add Hazards & Risks that are identified with this incident.
Step 7: ⚙️ Save and Finalize
Once all necessary details are entered, click Save to finalize the incident management. You can track the incident’s progress and outcomes through the portal.
❓ Troubleshooting
If you encounter issues:
- Ensure that all fields, especially those related to LTI, Investigation, and Cause/Corrections, are filled.
- Verify that you have the required permissions to manage incidents.
📞 Need Help?
For additional support or questions, contact our team at:
📧 Email: support@take5connect.com
📞 Phone (NZ): 0800 582 535