How Can We Help?
-
Account
- π¨βπΌ How to Change Your Username, Email, Password and Employer
- π§βπΌDownload the Mobile App (Google Play Store and Apple App Store)
- π§βπΌ How to Enable or Disable Automatic Sign-Outs for Your Sites
- π§βπΌ How to Make Someone Your Main Contact
- π§βπΌ How to Add a Company Logo to Your Account
- π§βπΌ How to Enable or Disable Notifications
-
Charts & Graphs
- π How to Create and Manage Dashboard Charts
- π How to Create and Manage Charts & Graphs
- π How to Access and Manage Sites Charts & Graphs
- π How to Access and Manage Account Inductions Charts & Graphs
- π How to Access and Manage Incidents Charts & Graphs
- π How to Access and Manage Tasks Charts & Graphs
- π How to Access and Manage Safety Observation Charts & Graphs
- π How to Access and Manage Form Charts & Graphs
- π How to Access and Manage Hazards & Risks Charts & Graphs
- π How to Access and Manage Audits & Inspections Charts & Graphs
- π How to Access and Manage Toolbox Talk Charts & Graphs
- π How to Access and Manage Site Activity Charts & Graphs
- π How to Access and Manage Messages Charts & Graphs
- π Understanding Chart Descriptions
-
Contractors
-
Digital Signatures
-
Employees
- π·ββοΈHow to Add Employees as Managers of Sites
- π·ββοΈHow to Add and Manage Employees
- π·ββοΈHow to Import and Export Employee Details
- π·ββοΈHow to Add Training & Competency Details and Certificates to an Employee's Profile
- π·ββοΈUnlocking a User After Multiple Failed Login Attempts
- π·ββοΈAccessing User Profiles
-
Form Builder
- π How to Use Form Categories
- π How to Set Up Reoccurring Forms
- π How to View and Link Forms to Sites
- π All About Form Settings
- π Setting Up Form Notifications
- π Exporting Forms
- π Assigning Forms
- π Creating Forms and Inductions
- π Approving, Rejecting Form Responses, and Viewing Audit Logs
- π Adding Images and Videos into Forms and Inductions
- π Viewing, Assigning, and Unassigning Forms
- π Adding Display Conditions to Forms
- πCompleting Forms and selecting Form Templates
- πHow Forms are typically processed
-
Hazards/Risks
-
Incidents
-
Inductions
-
Inspections/Audits
-
Messages
-
My Pre-Qualifications
-
TA/JSA/SWMS
-
Tasks
-
Templates
-
Reporting
-
Sites and Subsites
-
Safety Observations
-
Take5β’οΈ Connect Mobile App
- π± How to Report a Hazard or Risk via the Mobile App
- π± How to Enable or Disable GPS Tracking in the Mobile App
- π± How to Add Training/Competency Documents to Your Profile in the Mobile App
- π± How to Enable and Disable Notifications in the Mobile App
- π± How to Access the Admin Menu in the Mobile App
- π± How to Add Multiple Files in the Mobile App
- π± How to Sign Into the Mobile App
- π± How to Create a Toolbox Talk in the Mobile App
- π± How to Access Your Inductions in the Mobile App
- π± How to Complete a Task Assigned to You in the Mobile App
- π± How to Create a Task in the Mobile App
- π± How to Complete Approved Work from a Form in the Mobile App
- π± How to Select a Form Template in the Mobile App
- π± How to Complete Forms via the Mobile App
- π± How to Report a Safety Observation in the Mobile App
- π± How to Report an Incident through the Mobile App
- π± How to Conduct an Audit through the Mobile App
- π± How to Use Geofencing in the Mobile App
- π± Geofencing: Philosophy of Operations in Take5β’οΈ Connect
- π± Troubleshooting GPS Issues in the Mobile App
- π± How to Sign Into a Site via QR Codes in the Mobile App
- π± Why Take5β’οΈ Connect Requires Background Location Access
- π± How to Delete Your User Profile in the Mobile App
- π± How to Update Your Login Credentials and Employer in the Mobile App
- π± How to Download and Set Up the Take5β’οΈConnect Mobile App
- π± How to Complete the Daily Site Hazard & Noticeboard Message Acknowledgment
- π± How to Manually Sign Out of a Site in Mobile App
- Show Remaining Articles (12) Collapse Articles
-
Sites
- π’ How to Create a Site
- π’ How to Clone a Site
- π’ How to List, Remove or Archive Sites
- π’ Emergency Evacuation Plans
- π’ How to Add a Noticeboard Message to a Site
- π’ How to Add & Remove a Document to a Site
- π’ Managing Site Toolbox Talks
- π’ How to Create, Update, Print, or Delete QR Codes
- π’ How to Claim a QR Code
- π’ How to Scan a QR Code Using Your Phone Camera
- π’ How to Create a QR Code for a Site or Multiple Sites
- π’ How to Manage Task Analysis Documents for Existing Sites
-
Safety Plans
-
Safety Protocols
-
Notifications
< All Topics
Print
ποΈ Time Spent on Site Report
PostedApril 22, 2025
UpdatedApril 22, 2025
ByAmie
The Time Spent on Site Report in Take5β’οΈ Connect provides detailed data on the duration of user visits to your projects and sites. It helps track attendance, monitor compliance, and generate accurate reports for auditing purposes.
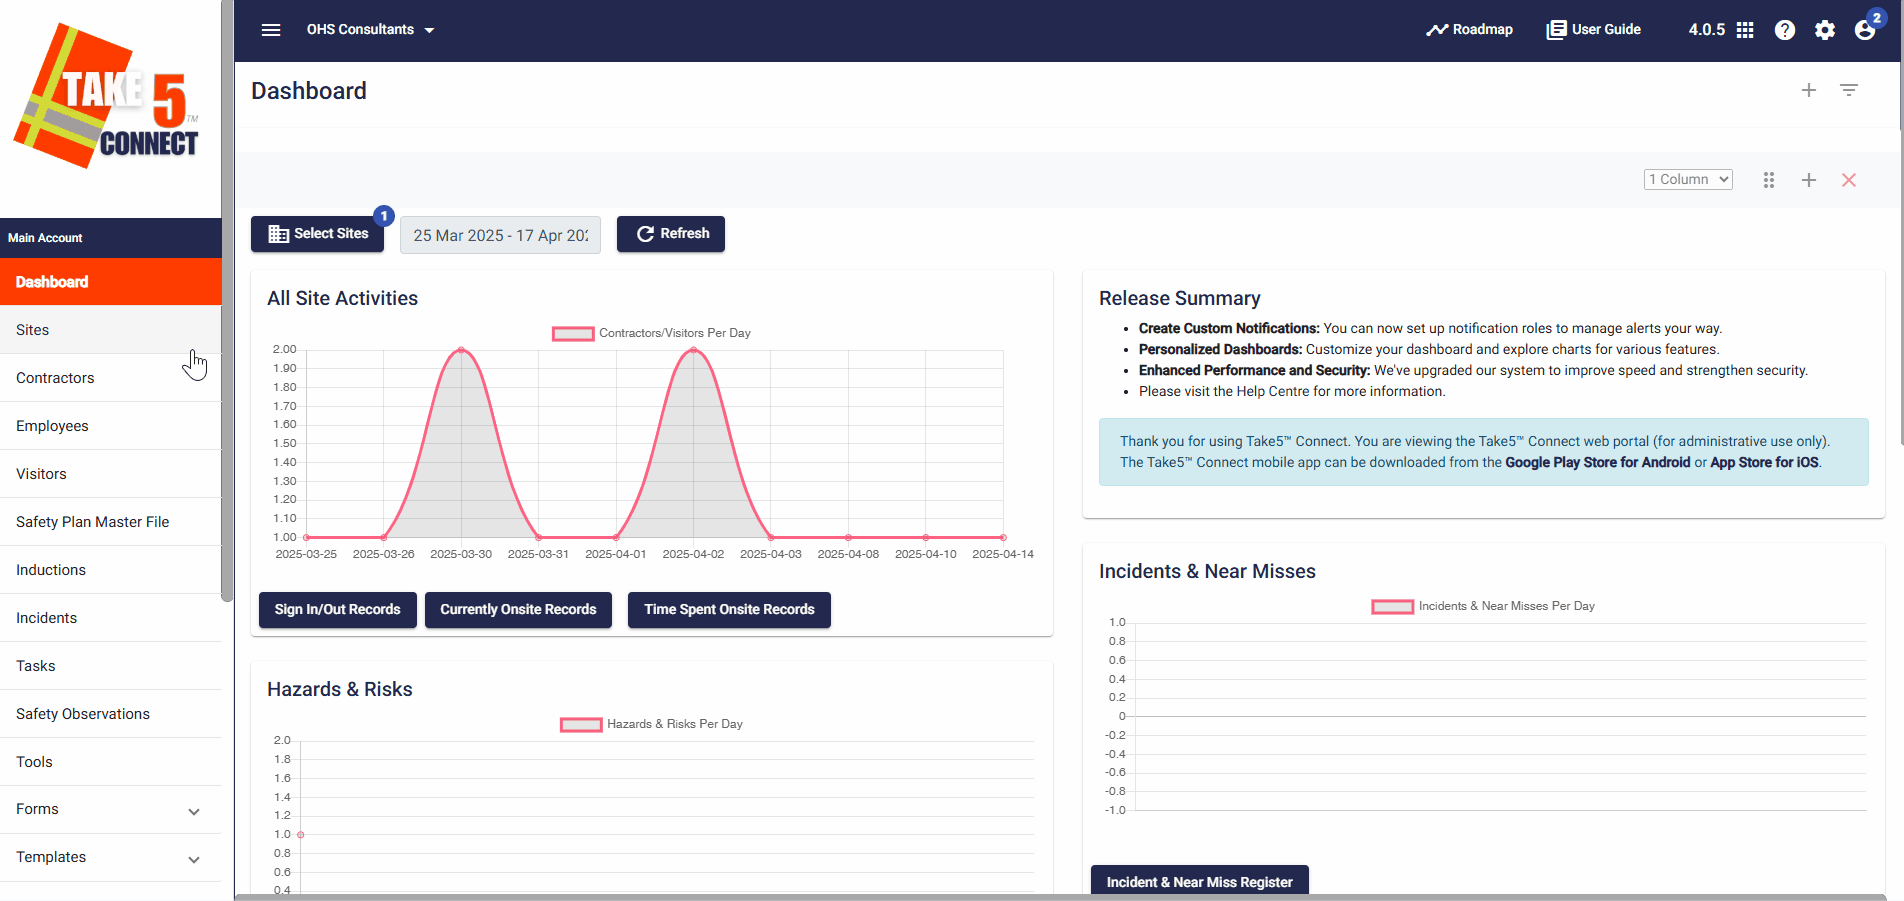
Step 1: π Access the Time Spent on Site Report
- Once logged in, go to the Reports section in the left-hand menu.
- Click on Time Spent on Site to view the report.
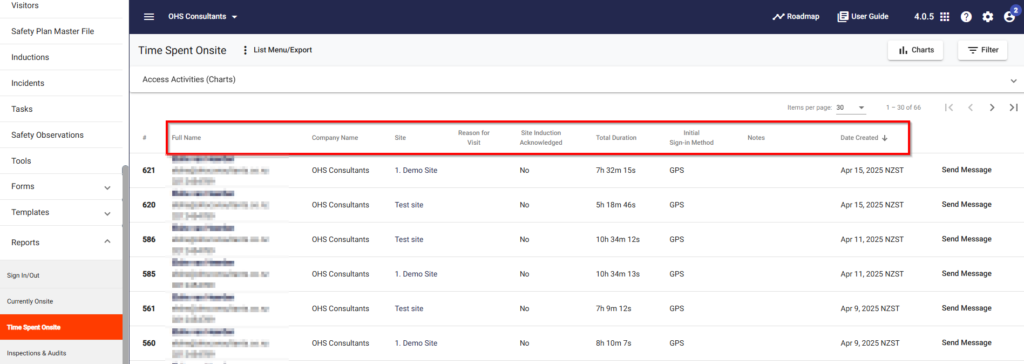
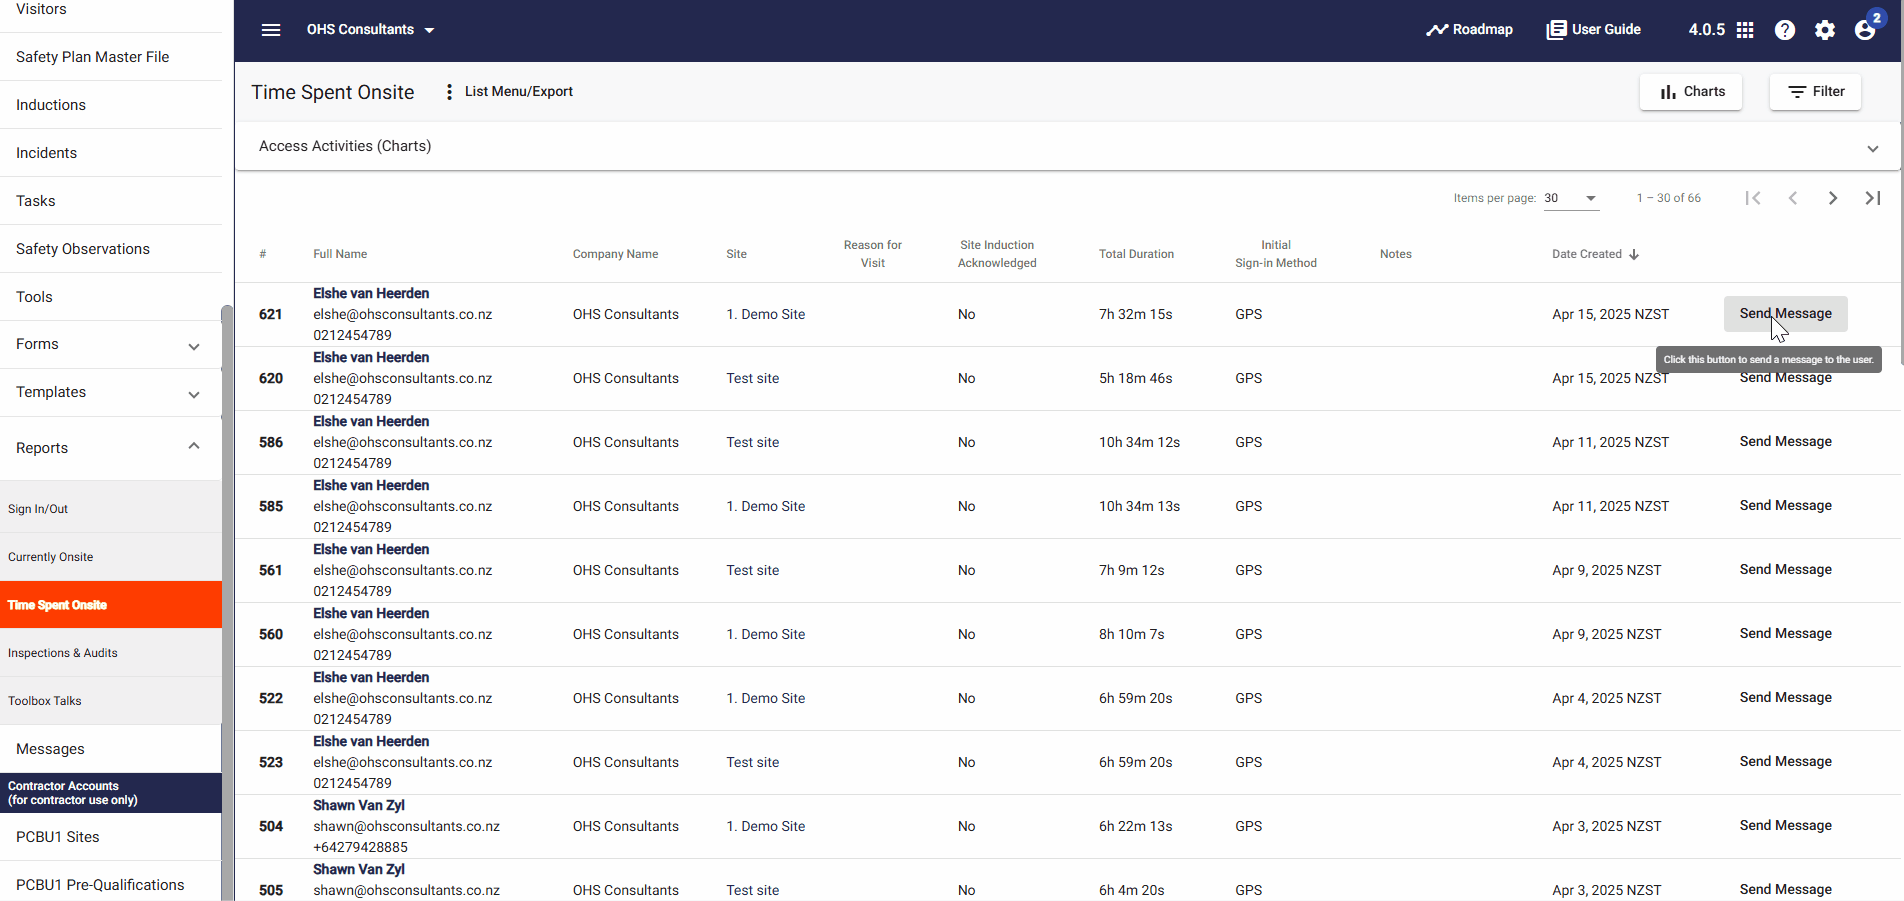
- The report will display a detailed list of users and their respective site visits.

Step 2: π Viewing Report Details
The Time Spent on Site Report includes the following information:
- User Name: The individual who signed in.
- Company Name: The company the individual is from.
- Site Visited: The specific site visited.
- Reason for Visit: The reason the user entered during sign-in.
- Site Induction Acknowledged: Yes or No
- Duration on Site: The total time spent on-site.
- Sign-In Method: QR Code, GPS, or Kiosk.
- Notes: Any notes created during site visit.
- Date of Visit: The exact date and time of the site visit.
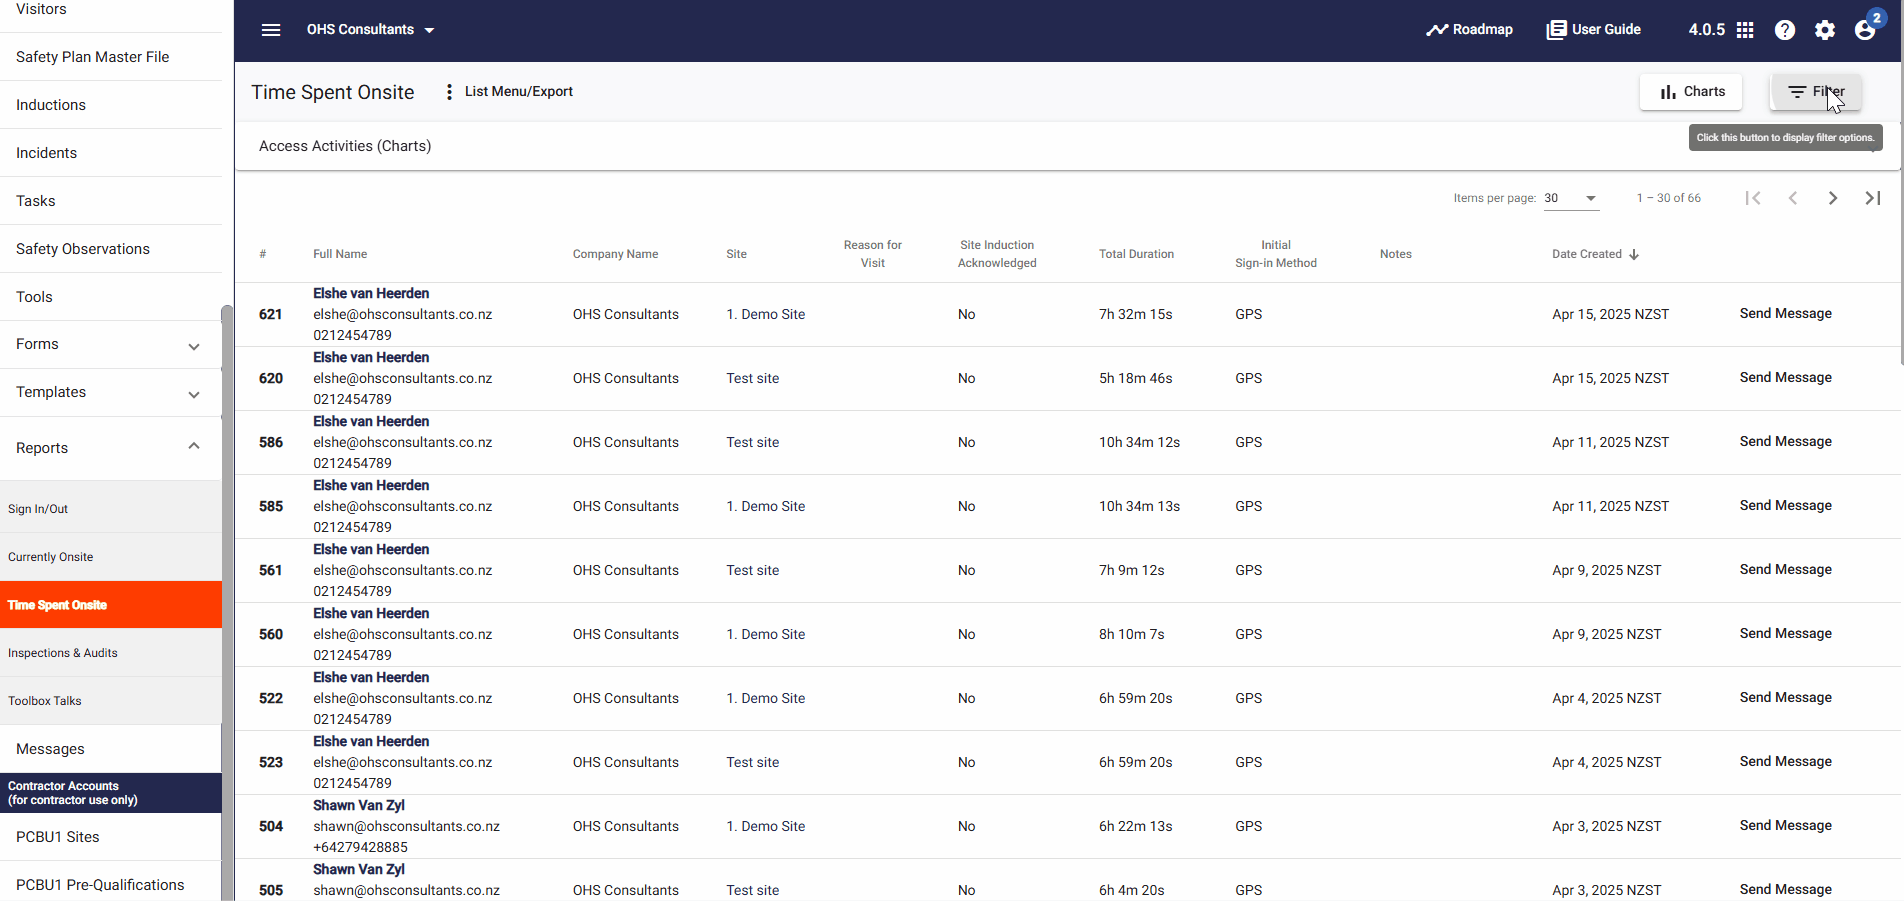
Step 3: π§ Filtering the Data
To refine your report:
- Use the Filter options to narrow down the data by:
- Sites
- Contractors
- Users
- Employees
- Date Range
- Click Apply Filters to update the report.
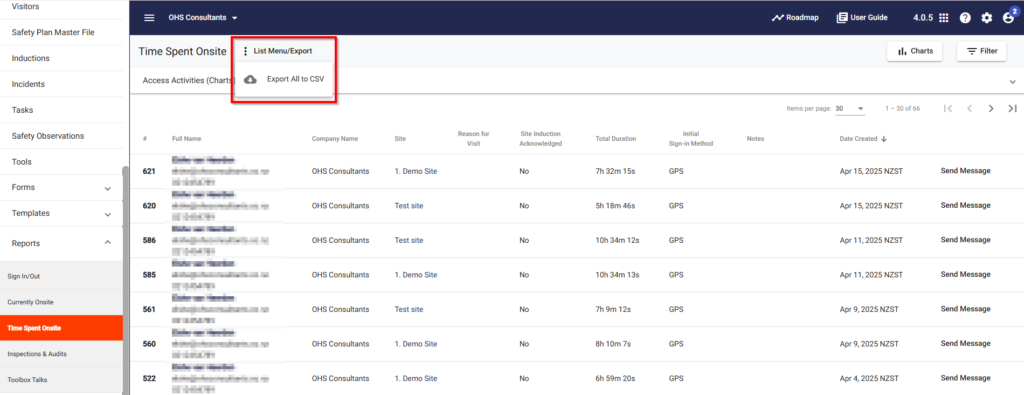
Step 4: π₯ Exporting the Report
- Click on the List Menu/Export button located at the top of the report.
- Choose CSV to download the report as a file for further analysis or record-keeping.

Step 5: π¬Sending Messages
- You can send the user a message by selecting Send Message next to the relevant entry.
- Then you can select: the message type, message priority, time zone and if you would like to schedule it to send later
- Then add a Subject and the content of the message.
- You can also select: sites, contractors, users or browse files.
- The select Send Message.

β Troubleshooting
- Report not displaying data? Ensure your date range or filter settings are correct.
- Can’t find a user or site? Verify the user is correctly signed in and the site has been properly set up under Sites & Subsites.
π Need Help?
If you need further assistance, please contact our support team at:
- Email: support@take5connect.com
- Phone (NZ): 0800 582 535